Setting Up a Purchase Goal for Shopify Store
This guide will walk you through the process of creating a Goal for your Shopify store that tracks every time an order is made. To accomplish this, we'll be creating a custom pixel through the Shopify Admin portal, which will allow Optimize to receive notifications from Shopify after every new transaction in your store.
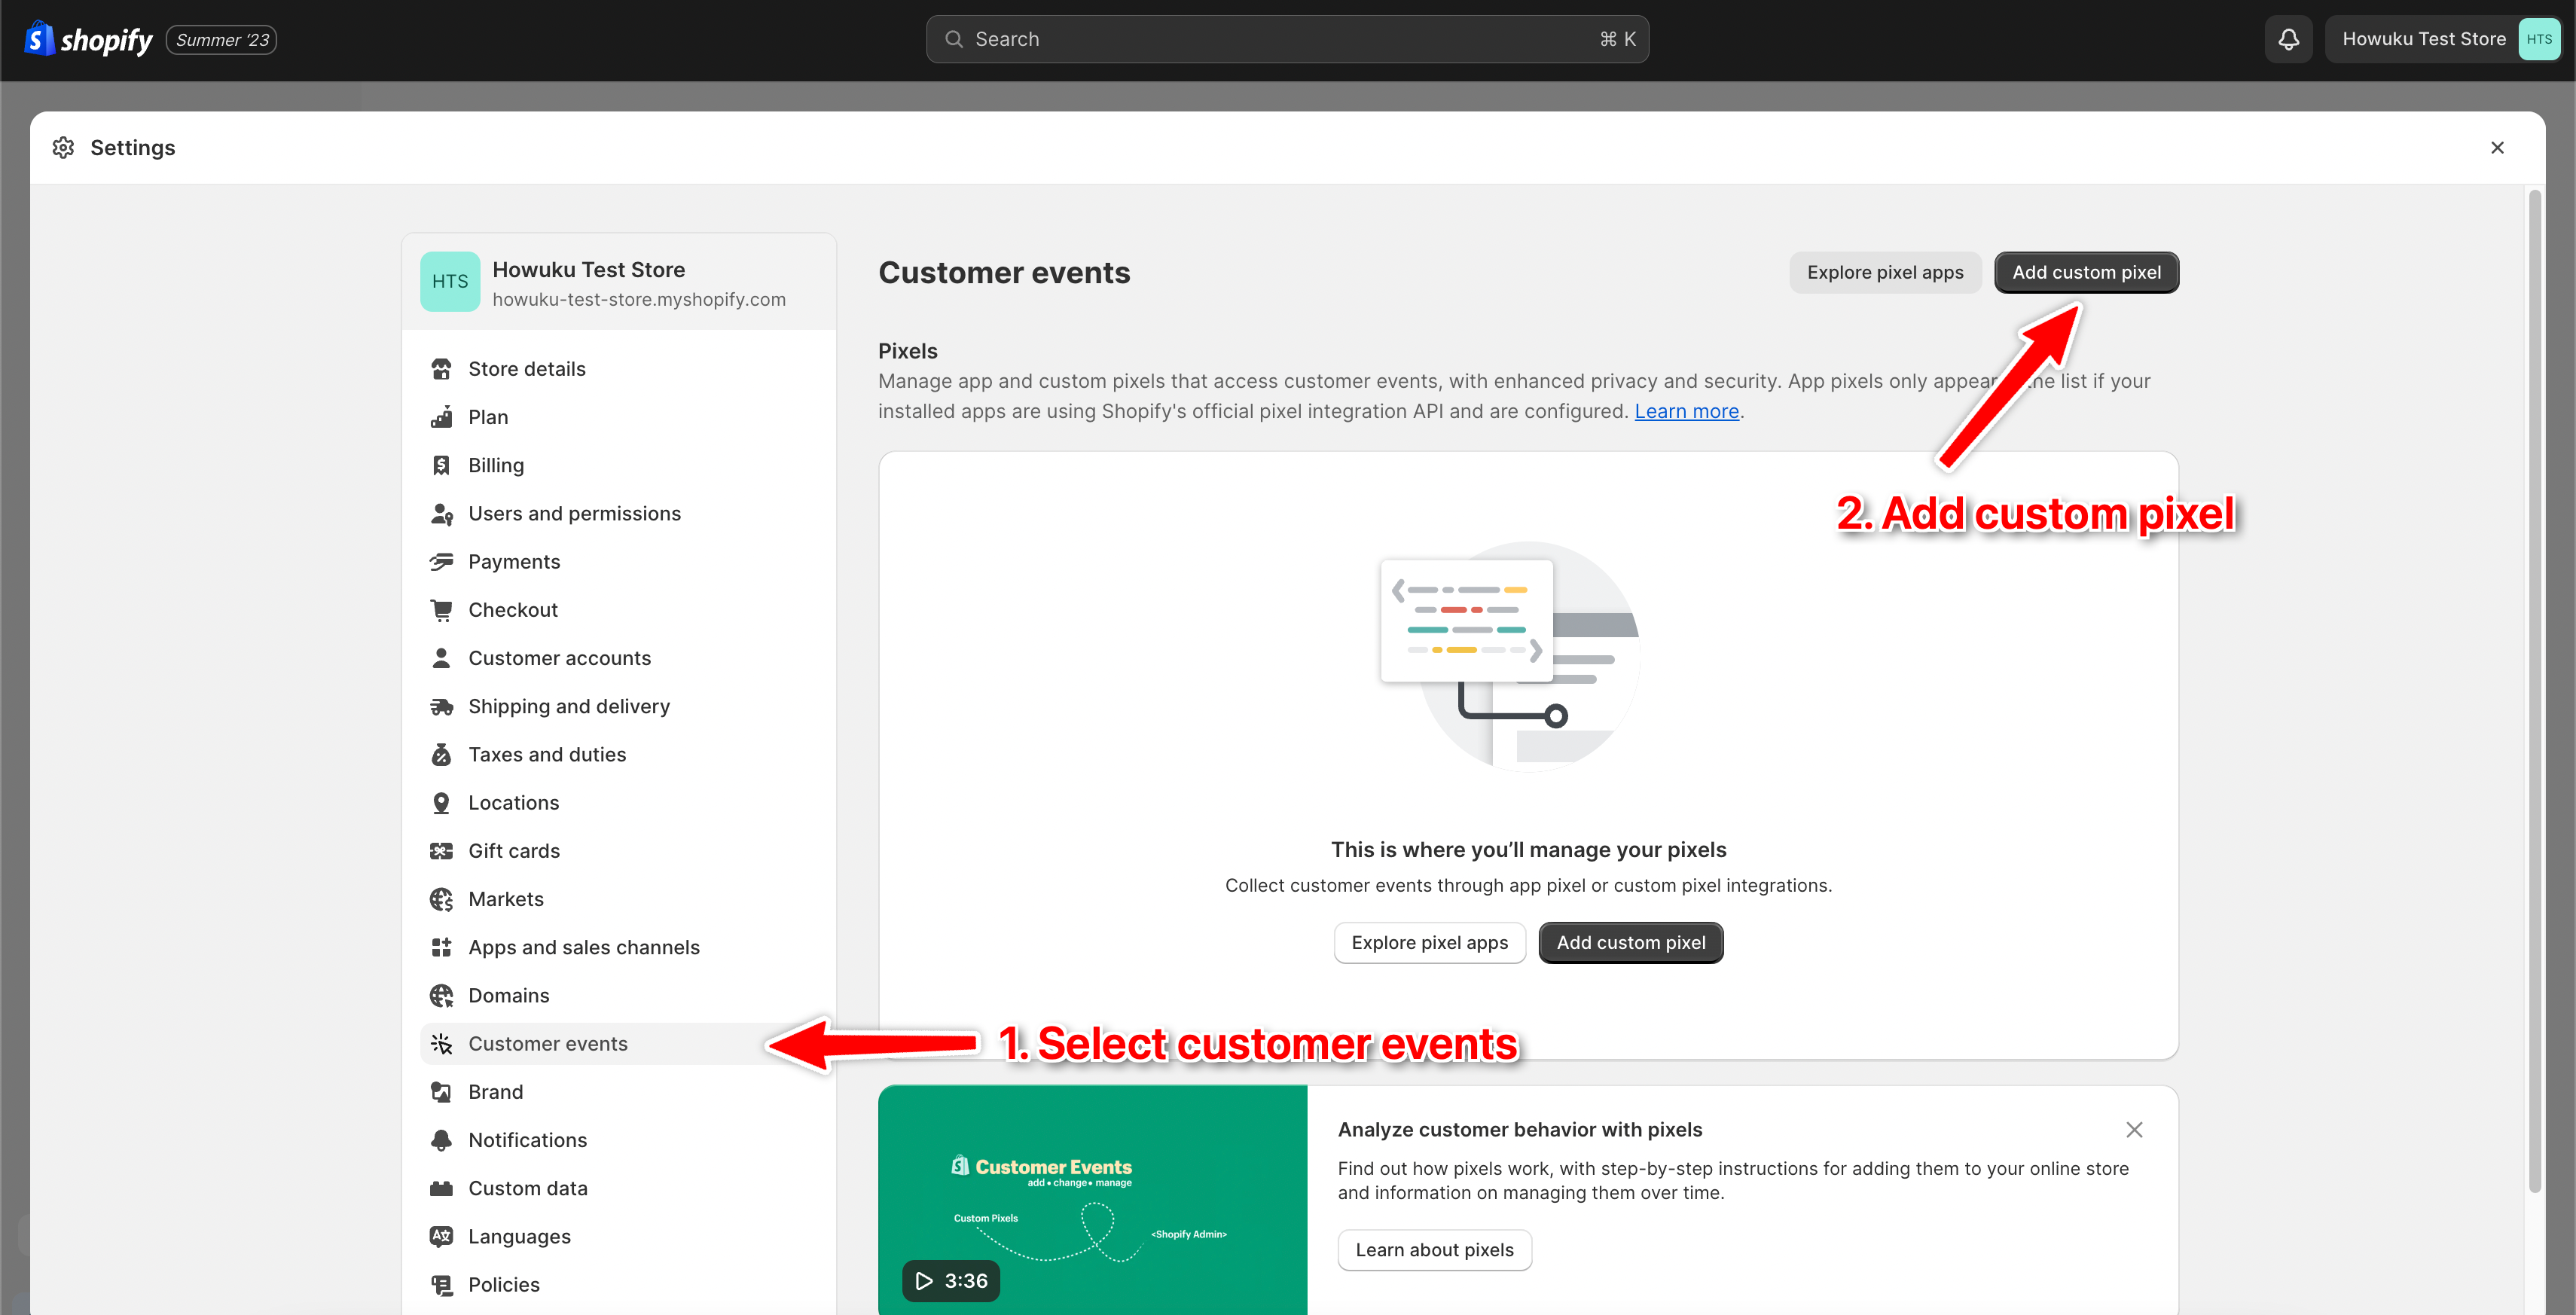
Step 1: Access Shopify Admin Portal
Go to your Shopify Admin portal and select Settings

Step 2: Visit Customer Events
Find and click on the "Customer Events" section under Settings. Click on "Add custom pixel" to generate an editable code snippet.
Step 3: Copy Code Snippet
Copy the provided code snippet into the code section of Custom Pixel.
const script = document.createElement('script');
script.setAttribute('src', 'https://cdn.howuku.com/js/otag.js?key=YOUR-PROJECT-KEY');
document.head.appendChild(script);

window.dataku = window.dataku || [];
function xoq(){dataku.push(arguments);}

(async function() {
  window._h_uuid = await browser.cookie.get('optimize_uuid');
})();

analytics.subscribe("page_viewed", event => {
  xoq('track','PageView');
});

analytics.subscribe("product_viewed", event => {
  xoq('track','ViewContent', {
    content_ids:  [event.data.productVariant.id],
    content_name: event.data.productVariant.title,
    currency: event.data.productVariant.price.currencyCode,
    value: event.data.productVariant.price.amount,
  });
});

analytics.subscribe("search_submitted", event => {
  xoq('track','Search', {
    search_string: event.data.searchResult.query
  });
});

analytics.subscribe("product_added_to_cart", event => {
  xoq('track','AddToCart', {
    content_ids: [event.data.cartLine.merchandise.product.id],
    content_name: event.data.cartLine.merchandise.product.title,
    currency: event.data.cartLine.merchandise.price.currencyCode,
    value: event.data.cartLine.merchandise.price.amount,
  });
});

analytics.subscribe("payment_info_submitted", event => {
  xoq('track','AddPaymentInfo');
});

analytics.subscribe("checkout_started", event => {
  xoq('track','InitiateCheckout');
});

analytics.subscribe("checkout_completed", event => {
  let quantity = event.data.checkout.lineItems.reduce((accumulator, item) => accumulator + item.quantity, 0);
  xoq('track','Purchase', {
    currency: event.data.checkout.currencyCode,
    value: event.data.checkout.totalPrice.amount,
    quantity: quantity
  });

  // Associate the visitor with their checkout email - sync email to Howuku
  xoq('identify', {
    email: event.data.checkout.email
  });

  // Trigger revenue goal
  xoq('revenue', {
    amount: event.data.checkout.totalPrice.amount,
    quantity: quantity
  });
});
Step 4: Edit Code Snippet
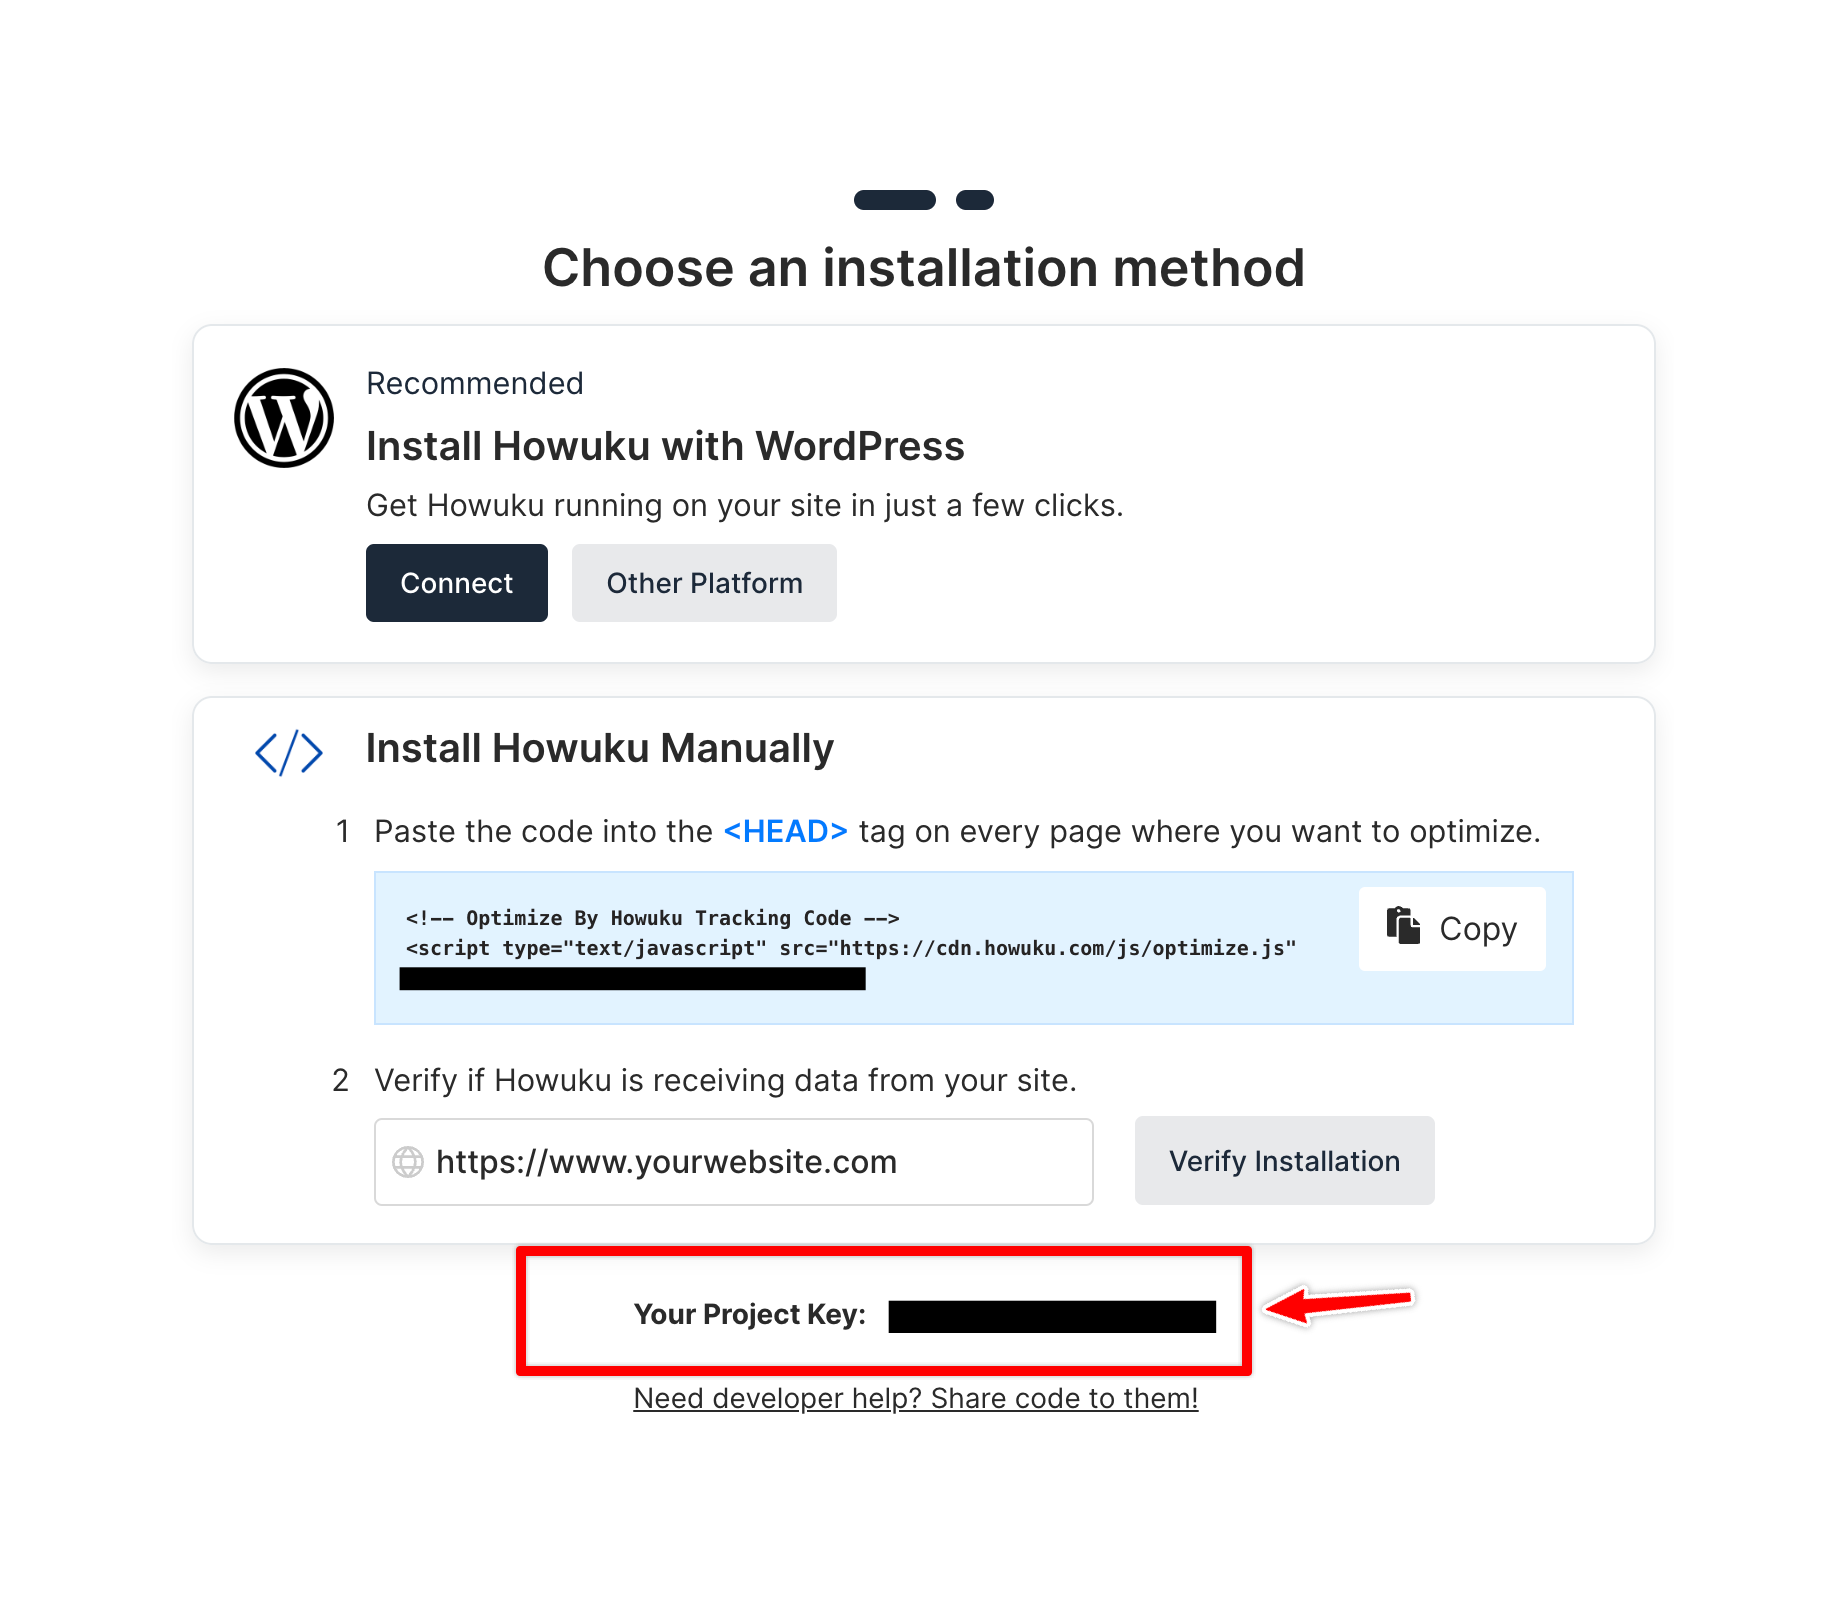
In the copied code snippet, replace the default project key with your own unique project key. This can be found in your account's settings or profile section.
You can find your company project key in the installation guide:
Step 5: Save and Connect
After updating the key, save your changes and exit the Settings section and remember to connect it!

Congrats! Now your custom pixel is ready. Shopify will notify Optimize whenever a new transaction happens in your store. This transaction event will be titled as "Purchase."
Set Up Your Goal
For tracking purposes, you need to set up your goal as "Purchase" and goal type as "Trigger an event". This will help keep track of all purchases made within your store and count as a conversion for your experiment!

Conclusion
With this setup, you should now be successfully tracking all orders made on your Shopify site. A video tutorial explaining these steps more in-depth is available at the following link: Setup Shopify Event Tracking
Was this article helpful?
That’s Great!
Thank you for your feedback
Sorry! We couldn't be helpful
Thank you for your feedback
Feedback sent
We appreciate your effort and will try to fix the article
